Dynamic Animations in mental ray (without the flicker)!
Ok. This one was a long time coming. There are posts everywhere on how to do an "animation" of a camera going through a static scene. I've got one on this website. The truth is, this is just static animation. The big question is: how do you achieve this with moving objects in the scene? This technique can be done in V-ray using the VRaySphereFade, but mental-ray has a different way to do this trick. I'm going to go through the magic steps to create a dynamic animation without flicker, without super high FG and GI settings, and without the outrageous render times.
This animation (200 frames @640x480)took 27 min to render with the following technique, even with my poor animation skills
It's not uncommon to think that because you have objects moving in your scene, you have to calculate FG/GI for every frame. This is true and untrue. With this technique here, we will only have to calculate FG/GI for every frame only for those objects that are moving. This is done in two render passes.
Once you have the background animation rendered, go back to your scene and hide everything that was rendered in your background pass, and unhide your animated characters.
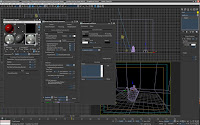
Then place a box to replace the scene. This box will project your background animation, and create a plate for the characters reflections and shadows to fall onto. Think of this box as an actors green screen room...it can be as detailed as you want it to be. If the characters are moving behind other foreground objects like a chair or shelf, these objects should be considered.
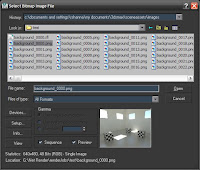
 We will use the Matte/Shadow/Reflection material. Apply this material to your box. Under the Camera Mapped Background slot, click on the button next to the color swatch and choose Environment/Background Camera Map. Now under the Map slot, this is where we will place our already created background animation as our background plate. Choose Bitmap, then locate to the first image sequence. Be sure you have Sequence checked, then click Open. This will create an .ifl file for your sequence.
 We will need an instance of the Environment/Background Camera Map so right click on the map and choose Copy. Now open the environment window by hitting 8. Click the Environment Map button and choose Environment/Background Switcher. To access the parameters drag an instance of this shader into an empty slot in the material editor.
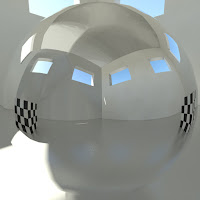
 On the Background button, right click and paste instance of the Environment/Background Camera Map. For the Environment/Reflections button apply the Environment Probe/Chrome Ball shader. Where it says Chrome/Mirror, you will need to place an image of a chrome ball of the scene...so of course I had to render a ball with a chrome shader in this scene. But this slot is where this image is placed, and is what determines the reflections in your character. I cranked up the multiplier to 5 to get a decent reflection.
Lastly we will create a Skylight in our scene. In the create tab, go to lights->Standard->Skylight. Place it anywhere. In the modifier settings choose Use Scene Environment.
 Other things to note: The lights for your character should closely match the lights in your background. So for this particular scene I created a rectangular directional light to match the light from the windows, so when the teapot was in sunlight it cast shadows to match the background. You can change the exposure of your scene too to get the most accurate match. I would suggest to turn off GI, but keep FG on for your characters. In your Matte/Shadow/Reflection material, be sure that Receive Shadows, AO, and Receive Reflections are all checked to get the best results.
Whew! That's it. This should get you a basic set-up for your dynamic animation to render. Unfortunately refractions aren't supported, and doing scenes with glass can be tricky. But now you can render dynamic animations super fast.
Here's the scene file to make sense of what I'm talking about: dynamicAnimations.zip
Happy testing!
Here's the scene file to make sense of what I'm talking about: dynamicAnimations.zip
Happy testing!

it would be great if you can share your scene file ..!
ReplyDeletethanks in advance,
regards
Nice gummy teapot Ramy! You need to start hiding some animated characters in our presentations ;)
ReplyDeleteWith this technique remains animated teapot without a shadow.
ReplyDeleteIf you look carefully there actually is a shadow for the teapot. I had to recreate the window geometry and lights to create the directional shadow. But you are right, by default there are not direct shadows for the moving character.
ReplyDeleteThank you buddy, this really helpful
ReplyDeleteThanks ramy,.. But I cant see the checkered box in the reflection on the teapot. Can you tell me why... !?
ReplyDeletelook again...it's there
ReplyDeleteThis looks like it works great unless your static scene geometry occludes your animated geometry. I'm looking at where the teapot floor reflection briefly overlaps the checkered box in the lower left corner. I guess the solution is to unhide the checkered box in the second stage render, since it should be considered as participating in the animation...
ReplyDeleteThese are very good settings thanks bro and also check my website for some great video tutorials.
ReplyDeleteRamy, your images under "my renderings" are bad to the bone. Nice work.
ReplyDeleteHello Ramy, Im loving this little tutorial. Im in the middle of match moving some live-footage and augmenting it with a cgi object and thus I needed the mental ray for realism.
ReplyDeleteYour method works really nicely but Im having trouble modelling my scene so that objects in front of the cgi object properly occludes it. Im using a box with the matte material on but how do I refine the box so that it accomodates my real footage? Any nifty little trick? The following screenshot shows the scene:http://img828.imageshack.us/i/screen1t.png/
Hello Ramy, Im loving this little tutorial. Im in the middle of match moving some live-footage and augmenting it with a cgi object and thus I needed the mental ray for realism.
ReplyDeleteYour method works really nicely but Im having trouble modelling my scene so that objects in front of the cgi object properly occludes it. Im using a box with the matte material on but how do I refine the box so that it accomodates my real footage? Any nifty little trick? The following screenshot shows the scene:http://img828.imageshack.us/i/screen1t.png/